
Introduction
Tacos and cheese are two culinary staples that have captured the hearts and palates of food lovers worldwide. Whether it’s the vibrant flavors of a traditional taco, filled with seasoned meat and fresh toppings, or the creamy, comforting texture of melted cheese, each ingredient brings something unique to the table. The combination of these two beloved elements is nothing short of magical, and that’s where Cheesy Taco Sticks come into play.
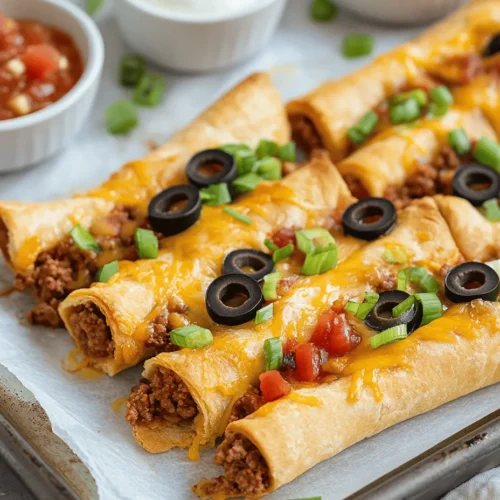
Cheesy Taco Sticks are not just a meal; they are an experience. This innovative recipe takes the classic taco flavors and transforms them into an easy-to-make snack that is perfect for any occasion. Whether you’re hosting a lively party, gathering with family for a cozy meal, or simply indulging in a movie night at home, these cheesy delights will surely impress your guests and satisfy your cravings.
The versatility of Cheesy Taco Sticks is one of their most appealing features. They can be served as an appetizer, a main dish, or even a fun finger food option for kids. With their flaky exterior and cheesy, flavorful filling, these sticks are not only delicious but also adaptable to various dietary preferences. You can easily substitute ingredients to create vegetarian versions or customize the fillings to suit your taste.
In this article, we’ll delve into the details of making Cheesy Taco Sticks, highlighting the key ingredients and providing clear, step-by-step instructions to ensure your cooking experience is seamless and enjoyable.
Understanding the Ingredients
To create the perfect Cheesy Taco Sticks, it’s essential to understand the role that each ingredient plays in the recipe. Here’s a closer look at the main components:
Ground Beef or Turkey
The protein base of your Cheesy Taco Sticks is crucial for flavor and texture. Ground beef is a classic choice that adds a hearty element to the dish, while ground turkey offers a leaner alternative without sacrificing taste. Both options provide a satisfying chewiness that complements the other ingredients beautifully. When cooked with the right seasoning, the meat becomes the flavorful foundation that ties the entire recipe together.
Taco Seasoning
Taco seasoning is the secret ingredient that elevates your Cheesy Taco Sticks from ordinary to extraordinary. This spice blend typically includes a mix of chili powder, cumin, garlic powder, onion powder, and paprika, which adds depth and character to the meat. The seasoning not only enhances the flavor profile but also brings the essence of traditional tacos into every bite. You can use store-bought taco seasoning for convenience or make your own with individual spices to suit your taste preferences.
Cheddar and Monterey Jack Cheese
Cheese is arguably the star of this dish. A combination of cheddar and Monterey Jack cheese creates a delightful meltiness that perfectly complements the seasoned meat. Cheddar cheese provides a sharp, tangy flavor, while Monterey Jack adds a creamy, mild taste that balances the overall richness. Together, they create a gooey, satisfying filling that is hard to resist. The cheese not only enhances the flavor but also adds a delightful texture that binds the ingredients together.
Crescent Roll Dough
The crescent roll dough serves as the flaky, buttery exterior that wraps the delicious filling. This dough is easy to work with and bakes up beautifully, creating a golden-brown crust that adds a pleasing crunch to each bite. The convenience of using crescent roll dough makes this recipe accessible for home cooks of all skill levels. Plus, it provides a perfect canvas for the flavorful filling, ensuring that each stick is as delightful to look at as it is to eat.
Diced Tomatoes, Black Olives, and Green Onions
To add freshness and texture to your Cheesy Taco Sticks, diced tomatoes, black olives, and chopped green onions are excellent additions. The tomatoes contribute a juicy burst that balances the richness of the cheese and meat, while the black olives bring a salty, briny flavor that complements the other ingredients. Green onions add a mild onion flavor and a pop of color, making the dish visually appealing. Together, these ingredients enhance the overall flavor profile and create a well-rounded snack.
Preparation Steps Explained
Now that we’ve covered the essential ingredients, let’s break down the preparation steps to ensure your Cheesy Taco Sticks turn out perfectly every time.
Preheating the Oven
The first step in making Cheesy Taco Sticks is to preheat your oven to the temperature specified in the recipe (typically around 375°F or 190°C). Preheating the oven is crucial for achieving the perfect bake. It ensures that the crescent roll dough cooks evenly and rises beautifully, resulting in a golden-brown exterior. While the oven is heating up, you can prepare the filling, making the most of your time in the kitchen.
Cooking the Meat
In a large skillet over medium heat, add your choice of ground beef or turkey. Use a wooden spoon to break the meat apart as it cooks. This process, known as browning, is essential for developing flavor. As the meat cooks, drain any excess fat if necessary. Once the meat is browned and cooked through, sprinkle in your taco seasoning along with a splash of water (as directed by the seasoning package) to help distribute the spices evenly. Stir the mixture until the meat is well-coated and simmer for a few minutes to allow the flavors to meld together. This step will ensure that your filling is flavorful and aromatic.
Incorporating Cheese and Vegetables
After the meat is seasoned, it’s time to add the cheese and vegetables. Lower the heat and stir in the grated cheddar and Monterey Jack cheese until it melts and combines with the meat. This will create a creamy, cheesy filling that is the hallmark of Cheesy Taco Sticks. Next, fold in the diced tomatoes, sliced black olives, and chopped green onions. These fresh ingredients will enhance the texture and flavor of the filling, making it even more delicious. Be careful not to overmix, as you want to maintain a balance of flavors and textures.
Preparing the Crescent Dough
Once your filling is ready, it’s time to prepare the crescent roll dough. Carefully unroll the dough on a clean, flat surface, and separate it into the individual triangles as indicated on the packaging. You’ll want to work with one triangle at a time to ensure that the dough remains manageable. If the dough is sticky, you can lightly flour your hands and the surface to prevent sticking.
Filling the Dough
Now comes the fun part: filling the dough! Take a generous spoonful of the meat and cheese mixture and place it at the wide end of each triangle. Be careful not to overfill, as this can lead to spills during the baking process. Gently roll the dough from the wide end toward the tip, tucking in the sides as you go to create a neat, sealed stick. Repeat this process for each triangle until all your filling is used up. Once rolled, place the Cheesy Taco Sticks on a baking sheet lined with parchment paper, ensuring they are spaced apart to allow for even cooking.
By following these steps, you will have created a delicious and visually appealing snack that is sure to impress your family and friends. The combination of flavors and textures in Cheesy Taco Sticks offers a delightful twist on the traditional taco, making it a perfect addition to any gathering or casual night in.
Stay tuned for the next part of this article, where we will dive into the baking process and share tips for achieving the best results with your Cheesy Taco Sticks!
Rolling and Slicing: Achieving Uniform Pieces for Even Baking
Once you’ve assembled your Cheesy Taco Sticks, the next crucial step is rolling and slicing them properly. This not only enhances the presentation of your dish but also ensures that they bake evenly. Start by gently rolling the dough around the filling, making sure to seal the edges tightly. A good tip is to use a bit of water on your fingers to help seal the dough—this prevents any cheese from leaking out during the baking process.
After rolling, slice the logs into uniform pieces, about 1 to 1.5 inches thick. This consistency is vital for even baking; thinner pieces may cook too quickly, while thicker ones could remain doughy. Use a sharp knife to make clean cuts, which will help maintain the integrity of the filling. Once sliced, you can arrange them on a baking sheet lined with parchment paper, leaving sufficient space between each piece to allow for expansion while baking.
Applying Egg Wash: Enhancing Appearance and Texture
To achieve that beautiful golden-brown color and a delightful crispy texture, an egg wash is a game-changer. Whisk together one egg and a tablespoon of water or milk until combined. Using a pastry brush, apply a thin layer of the egg wash over the tops of your Cheesy Taco Sticks. This step not only enhances the appearance but also adds a subtle richness to the flavor profile.
The egg wash creates a glossy finish as they bake, making your Cheesy Taco Sticks visually appealing. In addition, it helps the dough to crisp up nicely, giving you that perfect crunch with every bite. If you’re looking for a vegan alternative, consider using a mixture of almond milk and a tablespoon of cornstarch, which can achieve a similar effect.
Baking Process: Tips on Monitoring Doneness and Achieving Golden Perfection
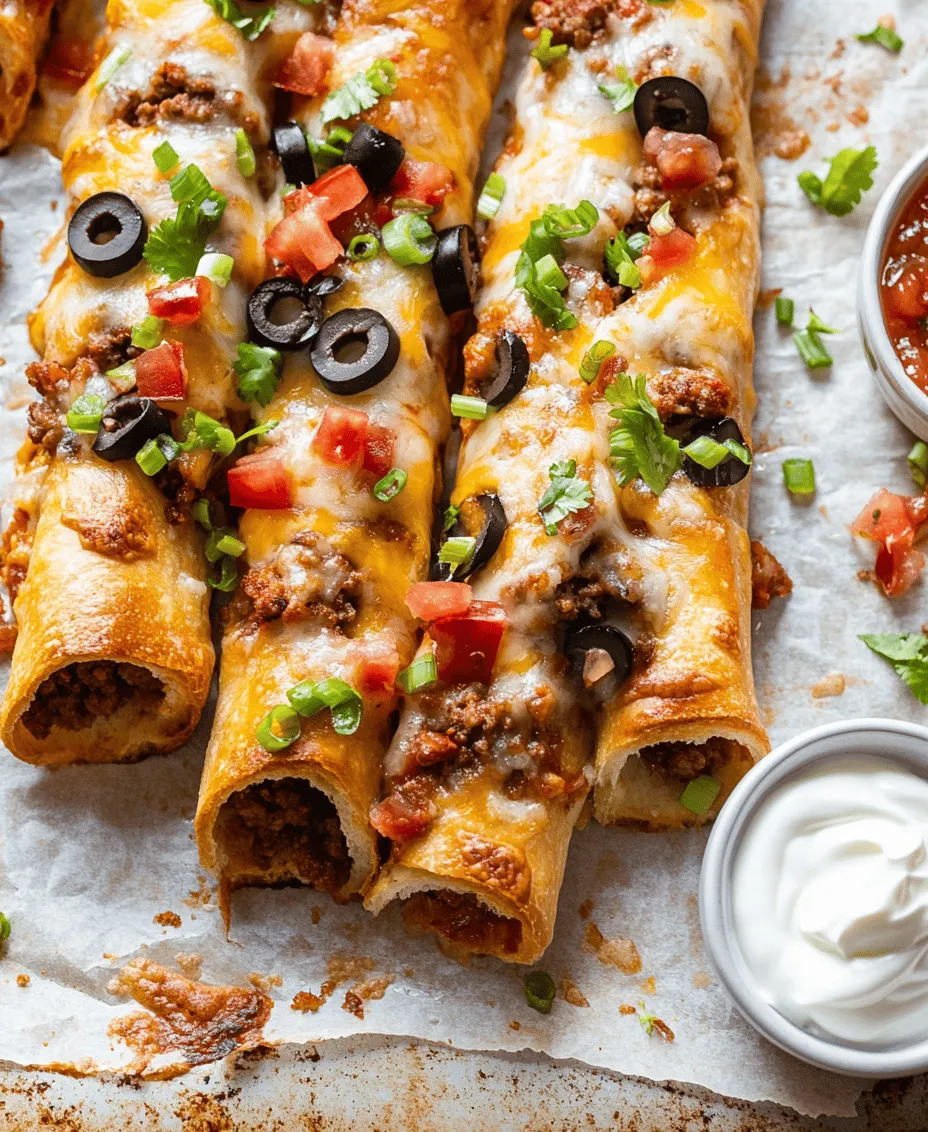
Preheat your oven to 375°F (190°C) and prepare to bake your Cheesy Taco Sticks. Place the baking sheet in the center of the oven, as this will allow for even heat distribution. Bake for about 15 to 20 minutes, or until they are golden brown and puffed up.
To monitor doneness, keep an eye on the color of the tops. They should turn a lovely golden hue, and the cheese may begin to ooze slightly from the sides, which is a good sign of a deliciously melted filling. If you find that the tops are browning too quickly while the insides are still raw, you can tent the Cheesy Taco Sticks with aluminum foil to prevent over-browning while allowing them to continue cooking through.
Serving Suggestions
Cheesy Taco Sticks are delightful on their own, but they can be even more enjoyable when paired with the right dips. Here are some ideas to elevate your serving experience:
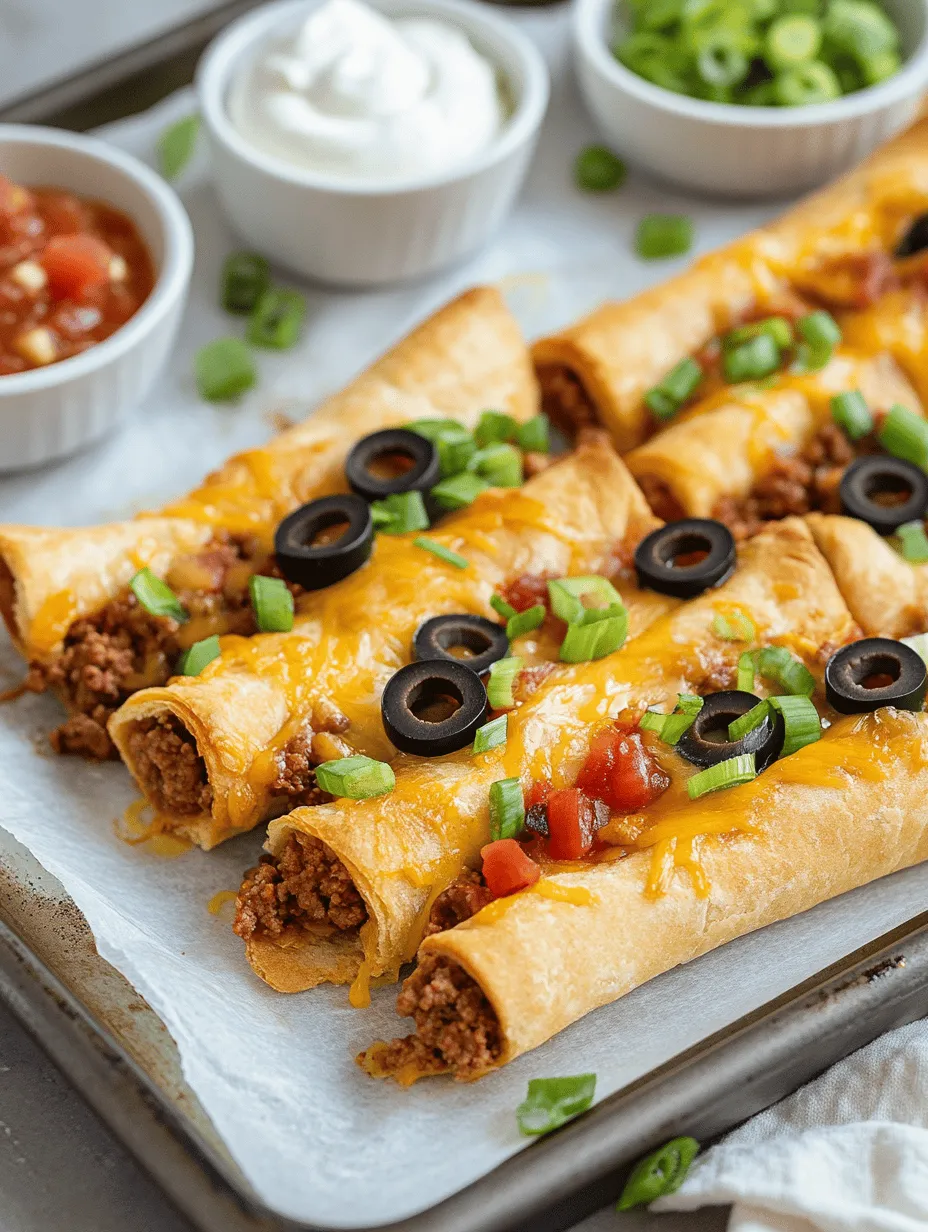
Traditional Salsa and Sour Cream
Classic pairings like salsa and sour cream complement the flavors of the Cheesy Taco Sticks beautifully. The freshness of the salsa balances the richness of the cheese, while sour cream adds a creamy texture that enhances every bite. You can opt for a mild salsa for a subtle flavor or a spicy variety for those who enjoy a kick.
Alternative Dips
For those looking to mix things up, consider serving your Cheesy Taco Sticks with alternative dips. Guacamole is a fantastic choice, providing a creamy and zesty contrast to the savory filling. Queso, a melted cheese dip, can also enhance the cheesy goodness of the sticks. If you’re feeling adventurous, try a spicy ranch dressing for a tangy, flavorful twist.
Nutritional Information
Understanding the nutritional profile of Cheesy Taco Sticks can help you enjoy them guilt-free. On average, each serving contains approximately 250-300 calories, depending on the specific ingredients used. Here’s a breakdown of the macronutrients:
– Protein: 12-15 grams
– Carbohydrates: 20-25 grams
– Fat: 15-20 grams
These values may vary based on the type of meat, cheese, and dough you choose. To make this recipe healthier, consider using lean meats such as ground turkey or chicken, low-fat cheese, or adding more vegetables like bell peppers, onions, or spinach for added nutrients.
Customizations and Variations
One of the best aspects of Cheesy Taco Sticks is their versatility. Here are some customization ideas to suit different dietary preferences and flavor profiles:
Vegetarian Options
For a vegetarian twist, substitute the meat with black beans or lentils. This not only maintains the hearty texture but also adds additional protein and fiber. You can enhance the flavor by adding spices such as cumin and smoked paprika to the beans or lentils.
Gluten-Free Options
If you’re catering to gluten-free diets, you can use gluten-free crescent rolls or other types of gluten-free dough. Make sure to check the labels to ensure they fit your dietary needs.
Flavor Variations
Experiment with different cheese combinations to create unique flavor profiles. For example, use pepper jack for a spicy kick, or add cream cheese for a creamy texture. You can also incorporate your favorite taco toppings like diced jalapeños, corn, or chopped cilantro into the filling for an extra burst of flavor.
Conclusion
Cheesy Taco Sticks are more than just a snack; they are a celebration of flavors that brings people together. The appeal of this recipe lies in its versatility and ease of preparation, making it a perfect choice for family gatherings, game day parties, or as a fun weeknight dinner.
We encourage you to try this recipe and make it your own by experimenting with various fillings, dips, and serving styles. The joy of sharing food goes beyond taste; it’s about creating memories around the dining table. So roll up your sleeves, gather your ingredients, and enjoy the delightful experience of making and sharing Cheesy Taco Sticks with your loved ones.