
Introduction
There’s something profoundly comforting about the aroma of homemade apple cinnamon rolls wafting through your kitchen. These delightful treats not only evoke feelings of nostalgia but also create a warm, inviting atmosphere that encourages family gatherings and cherished moments. Apple cinnamon rolls have gained immense popularity as a favorite breakfast option and a delectable dessert, making them a beloved staple in many households.
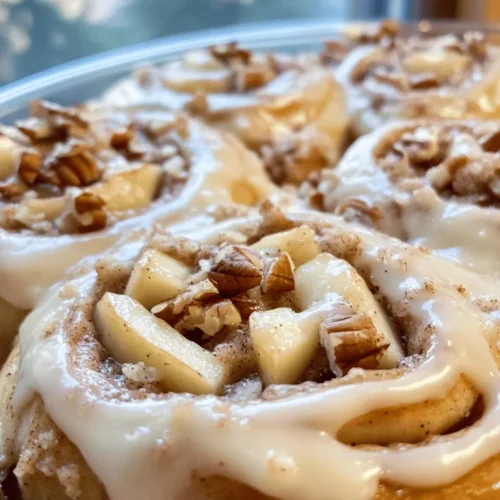
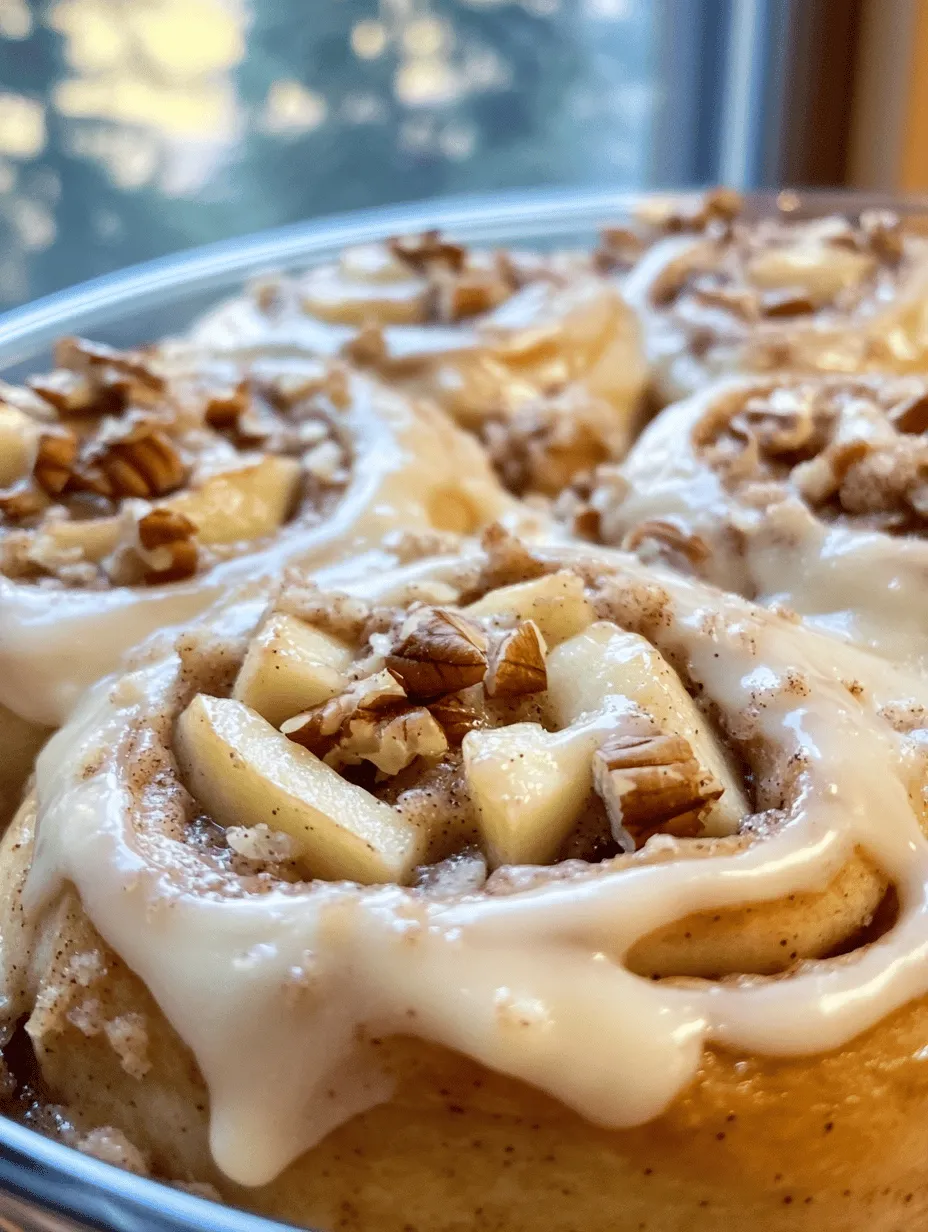
Imagine waking up to the smell of freshly baked rolls, their tender, fluffy dough enveloping a spiced apple filling that is both sweet and tart. Topped with a velvety cream cheese frosting, these rolls are an indulgent treat that is hard to resist. The combination of the soft, pillowy texture, the warm spices, and the rich frosting makes these apple cinnamon rolls an irresistible choice for any occasion.
This recipe promises to guide you through the creation of these delightful rolls, from the preparation of the dough to the final touches of the cream cheese frosting. Whether you’re looking to impress your family during the weekend brunch or satisfy a sweet tooth, these apple cinnamon rolls are sure to become a new favorite in your baking repertoire.
Understanding the Ingredients
Before diving into the baking process, it’s essential to understand the key ingredients that contribute to the deliciousness of apple cinnamon rolls. The right combination of ingredients will ensure that your rolls turn out perfectly, both in flavor and texture.
Key Ingredients for the Dough
1. All-Purpose Flour: This is the backbone of your dough. All-purpose flour provides the necessary structure and texture for the rolls. When combined with yeast, it helps create a light and fluffy result.
2. Yeast: Active dry yeast is crucial for the rising process. It ferments the sugars in the dough and produces carbon dioxide, which causes the dough to rise and become airy. Using fresh yeast is essential for optimal results.
3. Sugar: Sugar not only sweetens the dough but also acts as food for the yeast, enhancing its activity. A little sugar in the dough helps to create a tender roll.
4. Salt: Salt enhances the flavor of the dough and helps to strengthen the gluten structure. A balanced amount of salt is key to preventing the dough from becoming overly sweet.
5. Cinnamon: While cinnamon is primarily used in the filling, a pinch in the dough can enhance the overall flavor profile of the rolls.
Key Ingredients for the Filling
1. Apples: The star of the filling! The type of apple you choose greatly affects the flavor. For this recipe, Granny Smith apples are recommended for their tartness, which beautifully contrasts the sweetness of the sugar.
2. Brown Sugar: This adds a rich, caramel-like flavor to the filling and complements the spices.
3. Cinnamon: A classic spice for apple desserts, cinnamon adds warmth and depth to the filling.
4. Butter: Melted butter in the filling creates a luscious texture and helps the sugar and spices adhere to the apples.
5. Nuts (Optional): Chopped nuts like walnuts or pecans can add a delightful crunch and enhance the flavor of the filling. They are optional, but worth considering if you enjoy added texture.
Key Ingredients for the Cream Cheese Frosting
1. Cream Cheese: The base of the frosting, cream cheese provides a rich and tangy flavor that complements the sweetness of the rolls.
2. Powdered Sugar: This sweetens the frosting and helps achieve a smooth, spreadable consistency.
3. Vanilla Extract: A splash of vanilla enhances the flavor and adds a lovely aroma to the frosting.
4. Milk or Cream: A small amount of milk or cream may be added to achieve the desired consistency of the frosting.
Understanding these ingredients and their roles is foundational to achieving the perfect apple cinnamon rolls. Each element works harmoniously to create a treat that is not only delicious but also satisfying in its texture and flavor.
The Art of Making Dough
Now that we’ve established the importance of our ingredients, let’s move on to the first hands-on step: preparing the dough. The process may seem daunting at first, but with patience and attention, you’ll master the art of dough-making.
Step 1: Prepare the Yeast Mixture
To start, you will need to activate the yeast. In a small bowl, combine warm milk (around 110°F or 43°C) with a teaspoon of sugar and the yeast. Allow it to sit for about 5-10 minutes until it becomes frothy. This step is critical as it ensures that the yeast is alive and ready to help your dough rise.
Step 2: Mix the Dough Ingredients
In a large mixing bowl, combine the all-purpose flour, remaining sugar, salt, and cinnamon. Whisk these dry ingredients together to ensure they are evenly distributed. Create a well in the center and pour in the frothy yeast mixture, along with melted butter and an egg.
Using a wooden spoon or a dough whisk, gradually incorporate the flour into the wet ingredients until a shaggy dough begins to form. This process allows the flour to absorb the moisture and helps to develop the gluten structure.
Step 3: Knead the Dough
Transfer the dough to a lightly floured surface. Kneading is essential for developing gluten, which gives the rolls their structure and chewiness. Knead the dough for about 8-10 minutes, until it becomes smooth and elastic. If the dough sticks to your hands, sprinkle a little more flour as needed, but avoid adding too much to keep the rolls light and fluffy.
Step 4: First Rising
Once kneaded, shape the dough into a ball and place it in a lightly greased bowl, turning it to coat the surface with oil. Cover the bowl with a clean kitchen towel or plastic wrap, and place it in a warm, draft-free area to rise. Allow the dough to double in size, which typically takes about 1 to 1.5 hours. This rising process is crucial for achieving fluffy rolls, so be patient and resist the urge to rush.
Step 5: Punching Down
After the dough has risen, gently punch it down to release any air bubbles. This step helps redistribute the yeast and sugars, preparing the dough for shaping. Turn it out onto a floured surface again and give it a light knead for a minute before rolling it out.
Crafting the Perfect Filling
While your dough is rising, you can prepare the apple filling. This step is where the magic happens, as the combination of sweet apples and warm spices creates a deliciously aromatic mixture.
Step 1: Prepare the Apples
Start by peeling, coring, and slicing the apples into small chunks. The size of the apple pieces is important; you want them small enough to cook quickly but not so small that they turn to mush. Aim for even-sized pieces for uniform cooking.
Step 2: Combine Filling Ingredients
In a medium bowl, toss the chopped apples with brown sugar, cinnamon, and melted butter. This mixture will coat the apples and create a sweet, gooey filling as they bake. Adjust the amount of brown sugar based on your preference for sweetness; if you prefer a tarter flavor, you can reduce the sugar slightly.
Step 3: Add Optional Ingredients
If you’re using nuts, add them to the apple mixture at this stage. Chopped walnuts or pecans add a delightful crunch and enhance the overall flavor profile of the filling. You can also consider adding a pinch of nutmeg or allspice for an extra layer of warmth.
Step 4: Let the Filling Rest
Once your filling is prepared, set it aside to allow the flavors to meld together while your dough continues to rise. This waiting period enhances the taste of the filling, making the final product even more delicious.
Assembling the Rolls
With the dough risen and the filling prepared, you’re now ready to assemble your apple cinnamon rolls. This is where the anticipation builds as you create the rolls that will soon become a family favorite.
Step 1: Roll Out the Dough
Once your dough has completed its first rise, flour your work surface and gently roll it out into a rectangle, approximately 16×12 inches. It’s important to roll the dough evenly to ensure uniform rolls.
Step 2: Spread the Filling
Evenly spread the apple filling over the dough, leaving a small border around the edges. This will help contain the filling when you roll it up. Make sure to distribute the apple mixture evenly for consistent flavor in every bite.
Step 3: Roll and Cut the Dough
Starting from one of the long edges, carefully roll the dough tightly towards the opposite edge, creating a log shape. Once rolled, pinch the seam to seal it. Using a sharp knife or dental floss, cut the log into 12-15 equal pieces. Each piece will become a roll, so aim for even sizes for uniform baking.
Step 4: Second Rising
Place the cut rolls into a greased baking dish, ensuring they are close together but not touching. Cover the dish with a clean kitchen towel and let them rise for another 30-45 minutes until puffy. This second rise helps achieve the soft, airy texture characteristic of cinnamon rolls.
Step 5: Bake the Rolls
Preheat your oven to 350°F (175°C) while the rolls are rising. Once they are puffed and ready, bake them for approximately 25-30 minutes or until golden brown. The smell of apples and cinnamon will fill your kitchen, creating an irresistible atmosphere.
This completes the initial steps involved in making these irresistible apple cinnamon rolls. As you continue through the recipe, you will be well on your way to enjoying a delicious homemade delight that is sure to impress!
Rolling and Assembling the Rolls
Once your dough has risen beautifully, it’s time to transform it into the irresistible apple cinnamon rolls that will delight your taste buds. Begin by rolling out the dough on a lightly floured surface. Aim for a rectangle about 16×12 inches in size. This size is crucial as it allows for even distribution of your filling while also ensuring that the rolls maintain their shape during baking.
Visualizing the Rolling Process
As you roll out the dough, keep in mind that even pressure will ensure a uniform thickness. This is important for achieving consistent baking results. If you notice the dough is resistant, let it rest for a few minutes before continuing to roll. Once you have your rectangle, spread a generous amount of softened butter over the surface, leaving a small border around the edges. This butter serves as the glue for your filling.
Next, sprinkle a mixture of cinnamon and brown sugar evenly over the buttered surface, followed by the diced apples. The apples should be evenly distributed to ensure every bite is filled with that delicious apple-cinnamon goodness. When rolling the dough, start from the long edge, carefully rolling it up into a tight log. The tighter you roll, the better the spiral of your apple cinnamon rolls will be.
Tips for Cutting Uniform Pieces
Once your dough is rolled into a log, it’s time to cut it into uniform pieces. Use a sharp knife or a bench scraper to slice the log into 1 to 1.5-inch thick rolls. For an even cut, consider using a piece of dental floss or string—simply slide it under the log, cross it over the top, and pull tight to create a clean cut. This method reduces the risk of squishing the rolls, ensuring that they maintain their shape and fluffiness.
After cutting, place the rolls in a greased 9×13-inch baking dish or two round cake pans, leaving a bit of space between each roll to allow for expansion during the second rise.
The Importance of the Second Rise
Allow the rolls to rise again for about 30-45 minutes, or until they have puffed up and filled the gaps between them. This second rise is crucial for achieving that light and airy texture that makes homemade rolls so delightful. Cover the rolls with a clean kitchen towel during this time to prevent them from drying out.
Baking to Perfection
Now that your rolls have risen, it’s time to bake them to perfection. Preheat your oven to 350°F (175°C). The right oven temperature is vital, as it directly affects the texture and color of your rolls. A too-hot oven can cause the outside to brown too quickly, while the inside remains doughy.
Instructions for Baking
Place your baking dish in the preheated oven and set a timer for 25-30 minutes. Keep an eye on the rolls as they bake; you want them to turn a lovely golden brown. The aroma of cinnamon and apples will fill your kitchen, heightening your anticipation.
Tips for Checking Doneness
To check if the rolls are done, insert a toothpick into the center of one of the rolls. If it comes out clean or with a few moist crumbs, they are ready to come out of the oven. Avoid overbaking, as this can lead to dry rolls. Remember, they will continue to cook slightly after being removed from the oven.
Creating the Cream Cheese Frosting
While your rolls are baking, it’s the perfect time to prepare the cream cheese frosting that will elevate your apple cinnamon rolls to the next level. Gather your ingredients: softened cream cheese, unsalted butter, powdered sugar, vanilla extract, and a pinch of salt.
Step-by-Step Process
1. In a mixing bowl, beat the softened cream cheese and butter together until smooth and creamy. This will ensure your frosting has a light texture.
2. Gradually add the powdered sugar, mixing on low speed until well combined. This keeps the sugar from flying everywhere.
3. Add the vanilla extract and a pinch of salt, then mix until fully incorporated. The salt will enhance the sweetness of the frosting, creating a balanced flavor.
4. Adjust the consistency by adding a little milk if the frosting is too thick, or more powdered sugar if it’s too thin.
Frosting Flavor Variations
While this classic cream cheese frosting is perfect, feel free to experiment! Consider adding a hint of maple syrup for a warm, autumnal flavor, or a dash of cinnamon to tie in with the rolls. You could also incorporate a splash of lemon juice for a refreshing zing that contrasts beautifully with the sweetness of the rolls.
Frosting and Serving the Rolls
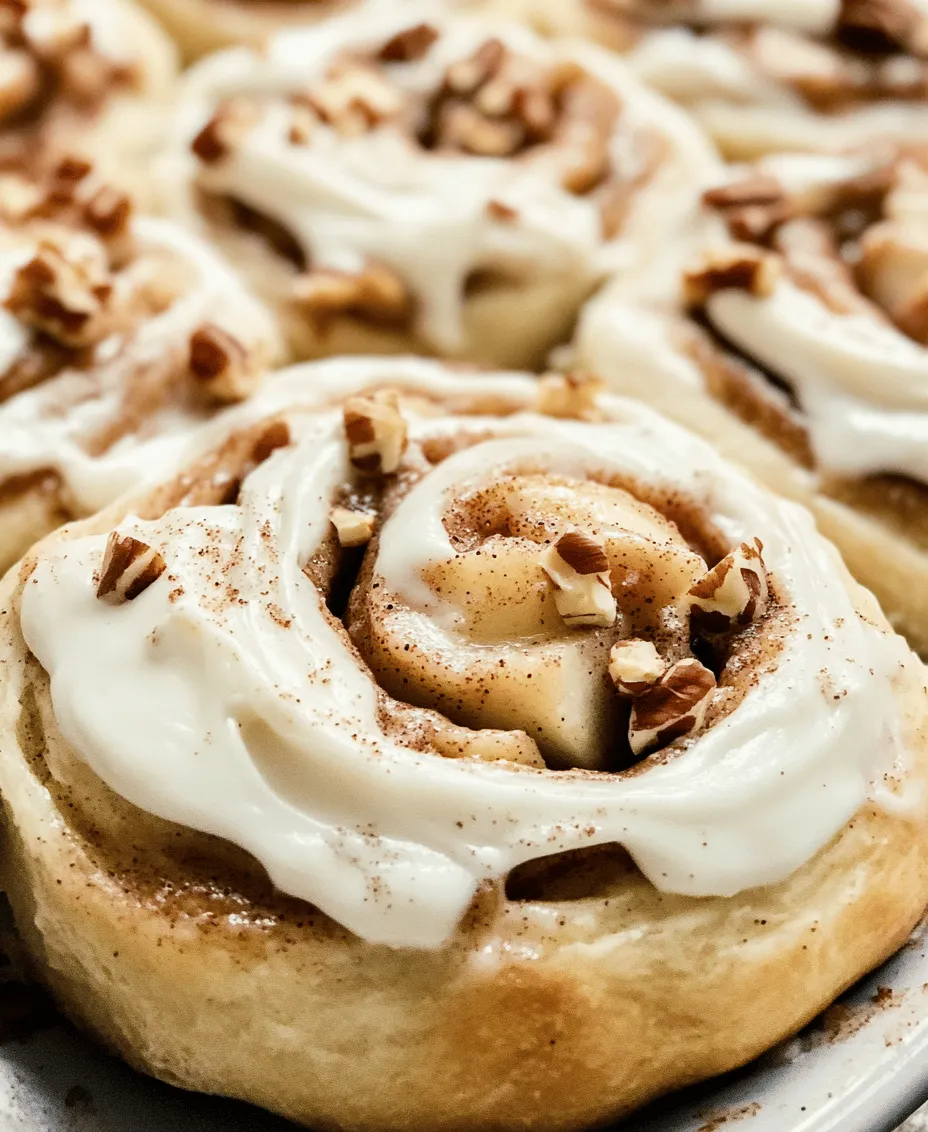
Once your rolls are out of the oven and slightly cooled, it’s time to frost them. For the best experience, frost the rolls while they are still warm. This allows the frosting to melt slightly, creating a deliciously gooey topping that enhances every bite.
Importance of Timing
Timing is key here; if you wait too long to frost, the cream cheese frosting will remain in plops on top rather than elegantly melting into the warm rolls. Use a spatula or the back of a spoon to spread the frosting evenly over the rolls, allowing it to seep into the crevices.
Serving Suggestions
These apple cinnamon rolls are perfect for breakfast or brunch, but they can also make a delightful dessert. Pair them with a cup of freshly brewed coffee or tea for a cozy experience. For a touch of elegance, consider garnishing with a sprinkle of chopped nuts or a dusting of additional cinnamon.
Storing and Reheating Leftovers
If you find yourself with any leftover rolls (though they may not last long), proper storage is essential to maintaining their freshness. Allow the rolls to cool completely before transferring them to an airtight container. They can be stored at room temperature for up to two days, or in the refrigerator for about a week.
Best Practices for Reheating
When you’re ready to enjoy the leftovers, preheat your oven to 350°F (175°C) and place the rolls on a baking sheet. Cover them loosely with aluminum foil to prevent them from browning too much. Heat for about 10-15 minutes, or until warmed through. If you prefer, you can also reheat individual rolls in the microwave for about 20-30 seconds, but be cautious not to overdo it, as this can make them tough.
Conclusion
Making homemade apple cinnamon rolls with cream cheese frosting is a rewarding process that results in a delicious treat for yourself and your loved ones. From the warm, spiced aroma that fills your kitchen to the first bite of fluffy dough topped with creamy frosting, every step is a joy. Embrace the art of baking and take your time with the process—each roll is a labor of love that is sure to impress.
We encourage you to try this delightful recipe, share it with friends and family, and savor the experience of creating something wonderful. Whether it’s a cozy family breakfast or a special occasion, these apple cinnamon rolls are sure to be a hit. Don’t forget to share your baking adventures and any variations you try; we love hearing how your culinary creations turn out!